March 21, 2011

Baby Chuck-style shoes

Our apartment has mainly stone tiles. For that reason our little man needs warm foot wear! I am always on the lookout when I am at car boot sales and flea markets for soft baby shoes, but our son is crawling on biiiig feet for a man of his size! He is a size 21 now at the age of 8 months. That means soft soled shoes are getting scares. I came across a crochet pattern for new born chucks, and thought I might be able to adapt them to his feet.
They did turn out a good bit bigger than I thought they would though, so now he can still grow into them...


I will try to explain how you can figure out how to make them fit your own munchkins. First you need a shoe that fits well (for size comparison). And of course two colours of  wool and a crochet hook (should be maybe a little smaller than advised, that way you will get a shoe that's a little bit warmer).


For the sole: (here in grey wool, or if you want to make them the proper chuck style, use white?)


I started with 8 ch (=chain) and then start with first round (You do not close it to a loop you simply go around it from both sides).
1. Rnd (= round): start with 2 ch, then make 2 hdc (= half double crochet) into the first s (= stitch), then one hdc into the next 6 s, the next s you put 4 hdc's in and then into the next 6 s 1 hdc, the last one you double again with 2 hdc finish off round with a ss (= slip stich).
2. Rnd: 2 ch,  double the next 2 s with 2 hdc, then next 8 s are simple hdc, next 4 s double with 2hdc in each s, then single hdc into next 8 s, double next 2 with 2 hdc, finish of round with a ss.
3.  - x-th Rnd: 2 ch, double next 2 s with 2 hdc, then simple hdc until you are at opposite end, then double next 2 s with 2 hdc, then simple hdc, until last 2 s of round, those you double again, finish off round with a ss. You make the amount of rounds until you have your oval shaped sole at the size of a fitting shoe, or maybe a little bigger ?! -> see above pic ;-)

y-zz-th Rnd: 2 ch, then one hdc in every s finish off round with 2 ss, this is the
side of the shoe that starts to come up and not really the sole anymore. Very small shoes would need 3 rounds, bigger ones 4-5 rounds.

Finish off!


toe cap: (also in grey)


1. Rnd: You start at front middle of sole (see picture for orientation)
with 2 sc (= single crochet) in a small shoe a bigger one would need 3 - 4 sc
2. Rnd:  1 ch, double all s
3. - x-th Rnd: 1 ch, double first and last s of each round, others in between all sc.
A small shoe would need 4 rounds altogether a bigger one may 2-4 rows more.

At end sew the sides of toe cap to side of sole (for orientation look at picture)


bootleg: (here in red wool)
first 3 to 5 Rnds depending on size of shoe: start on right hand side right behind toe cap:  1 sc in each s until you reach the left side right behind toe cap
next 4-8 Rnds, depending on size of shoe: decrease first and last two s, all others in between  1 sc per s.
next 3 - 5 Rnds. 1sc in each s
finish off with grey rim once around the whole bootleg (see picture for orientation)


tongue of the shoe: (in red wool)

start from one end of bootleg over the toe cap towards the other end of bootleg (see picture for orientation)


in the smallest version you probably don't need one at all, in bigger ones
first 1-3 Rnds: 1 sc in each s
Next Rnds decrease first and last s, in between those normal sc,
last round should be just one decreased sc.
finish off
Now just find some pretty shoe laces or you can take wool, but that wont last too long once your shoes are in use. If you have any questions, shoot me an email, or just post a comment.


March 16, 2011

My little garden on our balcony - It's seeding time!!

This is the first place I ever lived in that does not have a garden. All I have to work with is a small ~3m² south-west faced balcony. But I have found a lot of things I can grow in pots on my balcony. Okay you will not feed yourself on your produce all season by this method, as you simply do not have the space to grow enough food, but you can at least add a little something self grown to every meal!

One of the things growing very well in pots are herbs. And fresh herbs in home cooking simply rock!

And for the very first time ever, I tried to save some seeds last year (Oregano) and I planted them this year, so I will see how that worked for me...


As I am one to use as little plastic as possible and I prefer to recycle I used old egg cartons for seeding (instead of the plastic pots, one usually takes). You can use them for all those seeds that don't need to be covered by more than a cm of soil.


Seeds that need to be covered by a little more soil, but don't need much space at the sides, you can grow in old toilet paper rolls. A tutorial how to make those pots you can find here. (BTW, look around that blog a little further, it is absolutely worth it!)


I tried 2 red oranges, 1 lemon, and 1 avocado. For the avocado, have often tried this thing with the toothpicks over a glass of water (is that actually a hoax cruising the internet??), but it has never worked. But this week I made some avocado for my wee man for lunch, and that organic avocado that I used, happened to have a tiny tiny root coming out of the seed. So I thought I just stick it into some soil and see what happens. But the lemons and oranges work pretty well, I have grown a couple last year. You can also try peppers in all colours & pumpkins.


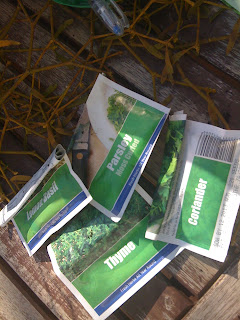
I also planted some tomatoes and lots and lots of herbs.
Once the Temperatures have risen a little more, and nights do not bring as much frost, I will try some lucullus for the first time. Last year I had spinach, that btw worked great, too.


March 14, 2011

Sunday Spring Walk...


Yesterday evening, it was lovely warm and sunny. My dog and her best friend went for a lovely walk, and we human companions tagged along... It was beautiful out there, you could smell and see SPRING everywhere. For us it was a particular long and cold winter. So even the littelest sign of it being over, is very much appreciated.


We came across this not very safe bridge (see front left bit in picture, it does not touch the ground....its about as shaky as walking a hammock..scary!!!)


and remnants of last spring:


I hope you had a chance of enjoying some spring this weekend, too!


A little Thank-You note for all my voters


I just wanted to write a THANK YOU note for all you out there who voted for me! I was pretty overwhelmed when I saw how many thumbs up I have gotten after such a short time blogging!
So THANK YOU everyone!


March 10, 2011

Vegetarian Lasagne with minced Soy

I have a serious craving for bolognese style sauce based on soy at the moment. Don't ask me why (I am not pregnant again, at least I hope...). So instead of serving for the x-th time this month Spaghetti Bolognese with granulated soy, I made a Lasagne. In case you are a non-vegetarian and are wondering what it is I use instead of the minced meat (as I have been asked many times) I use this.

It is a good bit more work, than the normal pasta version. So I had to pick a night where the wee man was in a good mood giving his Mommy a chance for some cooking. I normally have him happily hopping in his bouncer...making himself tired so it will be even easier to get him to sleep, before we eat...a win-win situation for all of us. Unfortunately, this doesn't work every night.


I started with the soy: I soaked
1 cup of granulated soy in
1/2 cups of Veg stock (boiling hot) and
1 chopped onion (red looks nicer, but an ordinary one will do)
1 bay leaf
1 tblsp. of dried oregano (never overdo oregano, you can get a bitter taste)
1 heaped tblsp. of basil (there just can never be enough...)
freshly ground black pepper and
a hint of cayenne pepper
I mixed it all well and left it soaking (covered) for 20 min
In the meantime for my white sauce I melted
roughly 80 gr of butter, added
1 bay leaf
freshly ground black pepper
(if unsalted butter, a little bit of salt)
stirred in roughly 80gr of flour (for best results sieved as there wont be any lumps in your white sauce later. Also stir well, do not let it get brown, just light golden)
then I poured in
2 cups of milk
let it come to boil while constantly whisking and then I took it of the heat. (But you still have to stir the sauce until it has cooled down just enough not to get that skin on top.)
Now I fried my Soy-mix in a pan with
a little olive oil, and added
1 can of unchopped peeled tomatoes and mashed them in the sauce pan (I use a potato masher) added
a knob of butter
left it boiling for a couple of minutes and then left it on side.

Now I got an oven proof casserole for the Lasagne and greased it.
(you will now need about
half a pack of Lasagne Pasta)

First layer is a little white Sauce then pasta, and on top of that a layer of bolognese sauce. Then starting off with the white sauce and kept going until I had used up my supplies. (Last layer should be white sauce). Then topped the whole lot with
grated cheese and
a little of basil

Now I just left it in a preheated oven at 200°C/390°F for 30 minutes with a lid, and in end for another 10 minutes without a lid for the cheese to get a little crusty.


I hope you enjoy it as much as we did!


March 05, 2011

Cranberry-Oatmeal-Cookies Part 1


A few months back my Husband went on a business trip to Portland and Seattle, and he brought back those absolutely amazing cranberry-and-oatmeal cookies. Seriously, I have not tasted anything like it. Now one could argue it was, because I was pregnant at the time, but I think if I tasted them now they would be just as yummy!

Anyway I wanted to try to make some myself ever since. This is my first attempt. They tasted good, but not yet up to the high standard these portland/seattle ones set. So there will be at least one more try...


I had one for breakfast this morning when I took the dog out. I have gotten into the habit of bringing my cup and a cookie or muffin with me every morning. This often seems to be the most peaceful meal of my day, even though I am out walking. Anyone who ever stated kids where no full time job LIED (or is lucky to have one of these (boring?) babies, that do nothing but sleep and feed all day/night ;-) )


This is how I made them:
Sieve into big bowl:
2 cups of plain flour
1/2 tsp salt
3/4 tsp cinnamon
1/3 tsp nutmeg
1/2 tbsp baking powder
1/2 tbsp baking soda
and mix well and set aside

take another bowl, melt
125gr of butter
mix with
3/4 cups of brown sugar and

1/2 cup of white sugar

take a cup and whisk:

2 tsp vanilla essence,
2 tbsp milk and

2 medium eggs


mix content of cup in with content of bowls. Mix well. Add
2 cups non-crunch-choc-chip-and-oats muesli and
1 cup of cranberries


make half hand palm sized little flat balls and leave on baking sheet. Make sure you leave enough space between each one of them. I had two sheets of cookies in the end.

Preheat oven to 180°C/325°F and bake them for 12-15 min. The edges should be golden.


March 01, 2011

Fast-made Hat for Babies


I just couldn't make up my mind which one to post....


I tested a sewing machine today. One my sister handed me down, because my old 1950s model I normally use, just can't handle the material. The transport seems to fail, and then my needle brakes. It got very frustrating... But still, I just love this old Lady!


I took a well fitting hat and traced it onto an old T-shirt, having the material in 2 layers!


Cut it out adding an extra cm for the seems.


If you like the little knot on top just add a little extra strap to your pattern, as seen above.

Next, sew the 2 layers together. Don't sew the top bit under the strap as you'll have to pull them out, when turning the hat to the other side.
Finally just knot the 2 laces and your hat is finished.


I just added a little smiling spider for the wee man, so the hat wouldnt be too boring looking.


Because the T-Shirt material is so soft, this happend to be our first non-tear hat experience! Now I only need an inspiration for a non-tear winter suit and/or coat. Have you got any ideas for me?