April 22, 2011

Food For Grown-Ups and Babies: Part 1 - Fried Asparagus with Pasta

Hello everyone, last night for the first time we cooked something our little man could eat with us...mashable, low on salt, easy on babies stomach!


you need
Tagliatelle, enough for Two and a little extra...(you know best how big your appetites are). Boil them according to the back of your package.
Then wash your
green asparagus (500gr) and cut off any dried and woody looking ends. Cut them length wise in half (thicker ones even quarter!) and then cut the halves into 3 cm long pieces.

Melt
80 gr butter in a frying pan, add
half a teaspoon of sugar and caramelise it in the melted butter, then add
1 tablespoon of olive oil, add the chopped asparagus, and fry on medium to semi-high heat for 10 minutes, keep stirring. It doesn't matter if they get a little brown. After the time is up taste one to make sure they are done! Add
a little black pepper,  and
100 ml fresh cream, let it simmer until the cream starts to get thick, add about 2-3 table spoons of freshly squeezed lemon juice, and
4 leaves of chopped fresh wild garlic, just before you serve the dish.


After taking out a portion for your littlest family members (blend before serving) you can add
a little salt to the portion left for the grown-ups.

Happy Easter Egg Hunt...


April 19, 2011

My wee garden on the balcony - part 2

Hello guys, I just thought it is time for a gardening update.


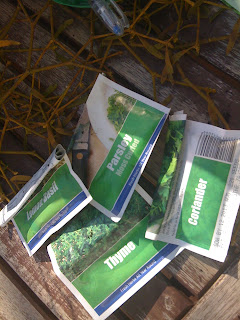
Most of my seeds were doing well, and showing some more or less green through the soil, but then a hot hot weekend day hit them, and I wasn't there to water them...or to get those poor little babes into the shade...and there went my thyme, my salad...so far a tough tomato survived and all of the coriander and parlsley..., my chives (they came back up all by themselves in the pot where I had them last year) are doing really well, and in the mean time I bought some strawberries, and planted some of them in my hanging balcony baskets.


I am not sure how the rest will survive, as from coming friday we are gone for nearly 5 days, and no one around to water them. I just hope for my plants that this heat wave comes to an end in time...

Keep your fingers crossed for my little green oases..

Thank you


April 12, 2011

2 ways of using up left-overs

There weren't many food posts lately, because I just didn't get the time to cook creatively never mind bake...
But I did think that these two rather fast made dishes from left overs were tasty enough to share them with you guys! I came up with both recipes last week, while I was in a hurry and only had a rather empty fridge, so be prepared for rather strange choices of ingredients!
For the first one I used left over Pasta from the night before: In my fridge were a ready to use pizza-dough, 1 pepper and half a zucchini/courgette, and to make it a bit more filling, I added some minced soy.
Here is what I did: Rolled out the pizza-dough on baking sheet, prepared the Soy according to the instructions on the back of the pack, plus added a little cayenne pepper , veg stock and oregano and basil, black pepper..stirred in the tomato sauce that came with the pizza dough, and poured the whole lot over the dough, then I added a layer of the left over pasta, a layer of chopped peppers and a layer of sliced zucchini and topped the whole lot with cheese (for a vegan pizza, you could try this, but I haven't tried it myself yet) and put it into the oven according to the instructions on the back of the package from my pizza dough...

the Picture does the greatness of my pizza no real justice...


For the second one my fridge was even emptier...it was rather late already and oh boy I was soooo HUNGRY....and all I had was rice and these veggie sausages also I found a bag of mexican vegetable-mix in the freezer and our kitchen cabinett was kind enough to supply me with a jar of mexican salsa....I think this dish actually took less then 10 min to be prepared and cooked!
I fried the rice (left over cooked rice from day before) and added the frozen veg, then I chopped the sausages (two of them) into slices and added them into the mix, once all was fried I added the salsa, some cayenne, ginger and black pepper...oh and I even found a rest of sour cream in our fridge still within a respectable UBD...strike! And I dont know if it only tasted so nice, because we were soooo hungry or if it would have tasted just as nice not half starved, but I really enjoyed this dish!


March 21, 2011

Baby Chuck-style shoes

Our apartment has mainly stone tiles. For that reason our little man needs warm foot wear! I am always on the lookout when I am at car boot sales and flea markets for soft baby shoes, but our son is crawling on biiiig feet for a man of his size! He is a size 21 now at the age of 8 months. That means soft soled shoes are getting scares. I came across a crochet pattern for new born chucks, and thought I might be able to adapt them to his feet.
They did turn out a good bit bigger than I thought they would though, so now he can still grow into them...


I will try to explain how you can figure out how to make them fit your own munchkins. First you need a shoe that fits well (for size comparison). And of course two colours of  wool and a crochet hook (should be maybe a little smaller than advised, that way you will get a shoe that's a little bit warmer).


For the sole: (here in grey wool, or if you want to make them the proper chuck style, use white?)


I started with 8 ch (=chain) and then start with first round (You do not close it to a loop you simply go around it from both sides).
1. Rnd (= round): start with 2 ch, then make 2 hdc (= half double crochet) into the first s (= stitch), then one hdc into the next 6 s, the next s you put 4 hdc's in and then into the next 6 s 1 hdc, the last one you double again with 2 hdc finish off round with a ss (= slip stich).
2. Rnd: 2 ch,  double the next 2 s with 2 hdc, then next 8 s are simple hdc, next 4 s double with 2hdc in each s, then single hdc into next 8 s, double next 2 with 2 hdc, finish of round with a ss.
3.  - x-th Rnd: 2 ch, double next 2 s with 2 hdc, then simple hdc until you are at opposite end, then double next 2 s with 2 hdc, then simple hdc, until last 2 s of round, those you double again, finish off round with a ss. You make the amount of rounds until you have your oval shaped sole at the size of a fitting shoe, or maybe a little bigger ?! -> see above pic ;-)

y-zz-th Rnd: 2 ch, then one hdc in every s finish off round with 2 ss, this is the
side of the shoe that starts to come up and not really the sole anymore. Very small shoes would need 3 rounds, bigger ones 4-5 rounds.

Finish off!


toe cap: (also in grey)


1. Rnd: You start at front middle of sole (see picture for orientation)
with 2 sc (= single crochet) in a small shoe a bigger one would need 3 - 4 sc
2. Rnd:  1 ch, double all s
3. - x-th Rnd: 1 ch, double first and last s of each round, others in between all sc.
A small shoe would need 4 rounds altogether a bigger one may 2-4 rows more.

At end sew the sides of toe cap to side of sole (for orientation look at picture)


bootleg: (here in red wool)
first 3 to 5 Rnds depending on size of shoe: start on right hand side right behind toe cap:  1 sc in each s until you reach the left side right behind toe cap
next 4-8 Rnds, depending on size of shoe: decrease first and last two s, all others in between  1 sc per s.
next 3 - 5 Rnds. 1sc in each s
finish off with grey rim once around the whole bootleg (see picture for orientation)


tongue of the shoe: (in red wool)

start from one end of bootleg over the toe cap towards the other end of bootleg (see picture for orientation)


in the smallest version you probably don't need one at all, in bigger ones
first 1-3 Rnds: 1 sc in each s
Next Rnds decrease first and last s, in between those normal sc,
last round should be just one decreased sc.
finish off
Now just find some pretty shoe laces or you can take wool, but that wont last too long once your shoes are in use. If you have any questions, shoot me an email, or just post a comment.


March 16, 2011

My little garden on our balcony - It's seeding time!!

This is the first place I ever lived in that does not have a garden. All I have to work with is a small ~3m² south-west faced balcony. But I have found a lot of things I can grow in pots on my balcony. Okay you will not feed yourself on your produce all season by this method, as you simply do not have the space to grow enough food, but you can at least add a little something self grown to every meal!

One of the things growing very well in pots are herbs. And fresh herbs in home cooking simply rock!

And for the very first time ever, I tried to save some seeds last year (Oregano) and I planted them this year, so I will see how that worked for me...


As I am one to use as little plastic as possible and I prefer to recycle I used old egg cartons for seeding (instead of the plastic pots, one usually takes). You can use them for all those seeds that don't need to be covered by more than a cm of soil.


Seeds that need to be covered by a little more soil, but don't need much space at the sides, you can grow in old toilet paper rolls. A tutorial how to make those pots you can find here. (BTW, look around that blog a little further, it is absolutely worth it!)


I tried 2 red oranges, 1 lemon, and 1 avocado. For the avocado, have often tried this thing with the toothpicks over a glass of water (is that actually a hoax cruising the internet??), but it has never worked. But this week I made some avocado for my wee man for lunch, and that organic avocado that I used, happened to have a tiny tiny root coming out of the seed. So I thought I just stick it into some soil and see what happens. But the lemons and oranges work pretty well, I have grown a couple last year. You can also try peppers in all colours & pumpkins.


I also planted some tomatoes and lots and lots of herbs.
Once the Temperatures have risen a little more, and nights do not bring as much frost, I will try some lucullus for the first time. Last year I had spinach, that btw worked great, too.


March 14, 2011

Sunday Spring Walk...


Yesterday evening, it was lovely warm and sunny. My dog and her best friend went for a lovely walk, and we human companions tagged along... It was beautiful out there, you could smell and see SPRING everywhere. For us it was a particular long and cold winter. So even the littelest sign of it being over, is very much appreciated.


We came across this not very safe bridge (see front left bit in picture, it does not touch the ground....its about as shaky as walking a hammock..scary!!!)


and remnants of last spring:


I hope you had a chance of enjoying some spring this weekend, too!


A little Thank-You note for all my voters


I just wanted to write a THANK YOU note for all you out there who voted for me! I was pretty overwhelmed when I saw how many thumbs up I have gotten after such a short time blogging!
So THANK YOU everyone!